Difference between revisions of "Xing"
From Contao Community Documentation
m |
|||
| (27 intermediate revisions by one user not shown) | |||
| Line 1: | Line 1: | ||
| − | |||
'''''I'm not a native English speaker. Please correct my mistakes.'''''<br /><br /> | '''''I'm not a native English speaker. Please correct my mistakes.'''''<br /><br /> | ||
[[File:Mod_xing_team.tpl.jpg|right|Xing Team]]Normally, you need not a module, because it is just a linked image. <br /> | [[File:Mod_xing_team.tpl.jpg|right|Xing Team]]Normally, you need not a module, because it is just a linked image. <br /> | ||
| Line 7: | Line 6: | ||
*several of them on one side, or distributed on several domains. | *several of them on one side, or distributed on several domains. | ||
<br /> | <br /> | ||
| − | First, categories are created, in these categories then the XING profile(s). With the XING-Lister, you can select the category that are used. Each front-end module can be assigned their own template. Three different templates are included. (see "Using") | + | First, categories are created, in these categories then the XING profile(s). With the XING-Lister, you can select the category that are used. Each front-end module can be assigned their own template. Three different templates are included. (see "[[Xing#Using|Using]]") |
<br /> | <br /> | ||
Thus, it is then possible, the categories to distribute on several layouts or several domains. Are there more than one profile in a category, all profiles will be shown from this category. Thus it would be e.g. possible to show the profiles of a whole team. | Thus, it is then possible, the categories to distribute on several layouts or several domains. Are there more than one profile in a category, all profiles will be shown from this category. Thus it would be e.g. possible to show the profiles of a whole team. | ||
| Line 13: | Line 12: | ||
{{ExtInfo | {{ExtInfo | ||
| Dev=Glen Langer ([[User:BugBuster|BugBuster]]) | | Dev=Glen Langer ([[User:BugBuster|BugBuster]]) | ||
| − | | DevSite=http:// | + | | DevSite=http://contao.ninja |
| − | | ExtVersion= | + | | ExtVersion= C3 3.1.0 / C4 1.0.0 |
| − | | Version= | + | | Version=from 2.9 |
| − | + | | ERLink=http://www.contao.org/extension-list/view/gl_xing.html / https://github.com/BugBuster1701/contao-xing-bundle | |
| − | | ERLink=http://www.contao.org/extension-list/view/gl_xing.html | + | |
| DonateLink=Cappuccino | | DonateLink=Cappuccino | ||
| − | | TrackerLink= | + | | TrackerLink=https://github.com/BugBuster1701/contao_xing/issues / https://github.com/BugBuster1701/contao-xing-bundle/issues |
| − | | Comment=Version for Contao | + | | Comment=Version for Contao 3 and Contao 4 are online |
}} | }} | ||
[[de:Xing]] | [[de:Xing]] | ||
| Line 27: | Line 25: | ||
=Forum= | =Forum= | ||
Questions about the Xing module will be answered in forum: <br /> | Questions about the Xing module will be answered in forum: <br /> | ||
| − | English: [ | + | English: [https://community.contao.org/en/forumdisplay.php?15 Forum]<br /> |
| − | German: [ | + | German: [https://community.contao.org/de/forumdisplay.php?119 Forum]<br /> |
<br /> | <br /> | ||
| − | Errors and requests can be reported in the | + | Errors and requests can be reported in the Issue Tracker. (Links see above.) |
| − | =Installation= | + | =Installation in Contao 3= |
The installation of the module occurs about the extension Repository in back end of Contao.<br /> | The installation of the module occurs about the extension Repository in back end of Contao.<br /> | ||
| − | A manual installation is possible. [ | + | A manual installation is possible. [https://contao.org/en/extension-list/view/gl_xing.html Download] the ZIP file from Extension Repository, unzip and transfer it.<br /> |
A directory should have been created "/system/modules/gl_xing".<br /> | A directory should have been created "/system/modules/gl_xing".<br /> | ||
Then call /contao/install.php - Perform Update Database. <br /> | Then call /contao/install.php - Perform Update Database. <br /> | ||
| − | |||
| − | = | + | =Installation in Contao 4= |
| − | + | Installation is performed using Composer. Details see [https://github.com/BugBuster1701/contao-xing-bundle/blob/master/README.md Readme on GitHub]. | |
| − | + | ||
| − | + | ||
| − | + | ||
| − | + | ||
| − | ==Xing Update version 1.x to version 2.x== | + | ==Contao 3: Xing Update version 1.x to version 2.x== |
{{Caution|Version 2.x is not fully compatible with previous versions, an update is possible.}} | {{Caution|Version 2.x is not fully compatible with previous versions, an update is possible.}} | ||
<br /> | <br /> | ||
| Line 61: | Line 54: | ||
===Xing=== | ===Xing=== | ||
[[File:Xing_en_backend.jpg|Xing Module Backend]] | [[File:Xing_en_backend.jpg|Xing Module Backend]] | ||
| − | <br /> | + | <br /> |
==Frontend== | ==Frontend== | ||
| Line 75: | Line 68: | ||
<br /><br /> | <br /><br /> | ||
| − | + | =Using= | |
| − | = | + | First, create a new category. In the category create the Xing profile(s).<br /> |
| − | + | Then, create a front end module and build it into the layout of the page.<br /> | |
| − | + | Here are the steps, each with the default values. [[Xing#Technical_Details|Technical details]] will be explained later. | |
| − | + | ||
| − | == | + | ==Create the category== |
| − | + | To create a new category, just click on the left in the back end in 'content' to 'Xing'. In the main area click on the button 'New category'. <br /> | |
| − | [[File: | + | [[File:Xing_en_backend_category.jpg|Xing - New category]]<br /><br /> |
| − | + | There, enter the name of the category. The front end module will later use this name. Then you click on "Save and close".<br /> | |
| − | + | Now you can see the category overview. By clicking on the pencil in the line of the category and repeated clicking on the pencil in the head of the category you return to the settings of the category. | |
| − | == | + | ==Create Xing Profile== |
| − | In | + | In the category list now clicking on Edit (pencil) of the category.<br /> |
| − | + | Now, either click the 'New profile' and then the arrow icon, or click the plus in the head of the category: <br /> | |
| − | [[File: | + | [[File:Xing_en_backend_profile_new.jpg|Xing - neues Profil]]<br /><br /> |
| − | + | Now, some information are needed: | |
| − | * XING | + | * XING Profile, e.g.: John_Doe, explanations are provided in the help. (Help Wizard) |
| − | * XING Layout | + | * XING Layout , explanations are provided in the help. (Help Wizard) |
| − | * " | + | * activate "Published" |
| − | + | Then you click on "Save and close". | |
| − | == | + | ==Front end Module== |
| − | + | A new front-end module is create with: | |
| − | * Layout -> Themes -> | + | * Layout -> Themes -> (Front end) Modules -> Add module (Contao 2.9 and newer) |
| − | + | ||
<br /> | <br /> | ||
| − | + | At first, enter the title, and only then select in "Module type": 'Xing' - 'Xing list'. It changes the form fields.<br /> | |
| − | + | In 'Xing Category' now select the previously created category, then 'Save and close'.<br /> | |
<br /> | <br /> | ||
| − | + | Now, the front end module must be included in the layout: | |
| − | * Layout -> Themes -> | + | * Layout -> Themes -> Layout -> Edit the used layout (Contao 2.9 and newer) |
| − | + | ||
| − | + | Include in 'Included modules' the just-created front end module (e.g. to left) | |
| − | ==CSS- | + | ==CSS-File== |
| − | + | As mentioned above, is provided a CSS file for presentation.<br /> | |
| − | + | For the first tests you should copy the file mod_xing_fe.css from '''/system/modules/gl_xing''' to '''/tl_files''' / '''/files'''.<br /> | |
| + | Then import them over the back end and activate it in the layout.<br /> | ||
=Technical Details= | =Technical Details= | ||
| − | + | Technical details are inside of the category and in the constructed front end module feasible / adjustable. | |
| − | == | + | ==Technical Details inside of the category== |
===Team Profile=== | ===Team Profile=== | ||
| − | In | + | In the category, you can create multiple Xing profiles.<br > |
| − | + | Use would be for example an overview of all team members.<br /> | |
| − | + | Depending on the template selection in front-end module, the category name is the team name.<br /> | |
| − | + | See the next section, as it could look like then. | |
| − | == | + | ==Technical Details in the front end module definition== |
| − | === | + | ===XING Template=== |
| − | + | Is defined in the category only one Xing profile, the following two templates are useful: | |
| − | * mod_xing_list , | + | * mod_xing_list, it shows only the linked graphic<br />[[File:Module_Xing_List.tpl.jpg|mod_xing_list]] |
| − | * mod_xing_list_profile, | + | * mod_xing_list_profile, it shows the linked graphic, including the profile name (underscore is removed)<br />[[File:Module_Xing_Profile.tpl.jpg|mod_xing_profile]] |
<br /> | <br /> | ||
| − | + | If several Xing profiles defined in the category to represent a team, the following two templates are useful: | |
| − | * mod_xing_list_profile, | + | * mod_xing_list_profile, it displays the graphics linked with each other, each including the profile name (underscore is removed)<br />[[File:Module_Xing_Profile-2.tpl.jpg|mod_xing_profile]] |
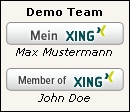
| − | * mod_xing_list_team, | + | * mod_xing_list_team, as mod_xing_list_profile, in addition displays above the first graphic the team name (category name)<br />[[File:Module_Xing_Team.jpg|mod_xing_team]] |
<br /> | <br /> | ||
| − | + | You can save your own templates in the folder /templates or in the template folder of the used theme.<br /> | |
| − | + | Template names must begin with '''''mod_xing_list''''' and must have the suffix '''''.tpl''''' / '''''.xhtml''''' / '''''.html5'''''. ( e.g.: '''''mod_xing_list_club66.xhtml''''' ) | |
<br /> | <br /> | ||
| + | ===Company Template=== | ||
| + | For a company profile, XING has a different destination URL. Therefore it was created a custom template. | ||
| + | Please select the template "mod_xing_list_company" for a company profile. | ||
| − | === | + | ===Show to guests only=== |
| − | + | Hide the module if a member is logged in. | |
| − | === | + | ===Protect module=== |
| − | + | Show the module to certain member groups only. | |
Latest revision as of 23:15, 26 March 2016
I'm not a native English speaker. Please correct my mistakes.

But my aim was:
- to select the image
- to determine the position
- several of them on one side, or distributed on several domains.
First, categories are created, in these categories then the XING profile(s). With the XING-Lister, you can select the category that are used. Each front-end module can be assigned their own template. Three different templates are included. (see "Using")
Thus, it is then possible, the categories to distribute on several layouts or several domains. Are there more than one profile in a category, all profiles will be shown from this category. Thus it would be e.g. possible to show the profiles of a whole team.
| Extension-Overview | |
|---|---|
| Name of the developer | Glen Langer (BugBuster) |
| Developer Website | http://contao.ninja |
| Version of the extension | C3 3.1.0 / C4 1.0.0 |
| Compatibility with Contao Version | from 2.9 |
| Link to Extension Repository | http://www.contao.org/extension-list/view/gl_xing.html / https://github.com/BugBuster1701/contao-xing-bundle |
| Donate the developer | Cappuccino |
| Link to Tracker | https://github.com/BugBuster1701/contao_xing/issues / https://github.com/BugBuster1701/contao-xing-bundle/issues |
| Comment | Version for Contao 3 and Contao 4 are online |
Contents
Forum
Questions about the Xing module will be answered in forum:
English: Forum
German: Forum
Errors and requests can be reported in the Issue Tracker. (Links see above.)
Installation in Contao 3
The installation of the module occurs about the extension Repository in back end of Contao.
A manual installation is possible. Download the ZIP file from Extension Repository, unzip and transfer it.
A directory should have been created "/system/modules/gl_xing".
Then call /contao/install.php - Perform Update Database.
Installation in Contao 4
Installation is performed using Composer. Details see Readme on GitHub.
Contao 3: Xing Update version 1.x to version 2.x
| |
Caution: Version 2.x is not fully compatible with previous versions, an update is possible. |
What is to be observed, can be found here.
Overview
The Xing module contains a back end and a front end module.
In the back end, there are "Xing", for the front end "Xing list".
Back end

Frontend
For the front end module, a CSS file is included as an example:
- mod_xing_fe.css for a normal, line-by-line output.
Xing Banner
The simplest variant, only the linked image:
![]()
The more complex variant, several Xing banner of a team, with team name and names of team members.

Using
First, create a new category. In the category create the Xing profile(s).
Then, create a front end module and build it into the layout of the page.
Here are the steps, each with the default values. Technical details will be explained later.
Create the category
To create a new category, just click on the left in the back end in 'content' to 'Xing'. In the main area click on the button 'New category'.

There, enter the name of the category. The front end module will later use this name. Then you click on "Save and close".
Now you can see the category overview. By clicking on the pencil in the line of the category and repeated clicking on the pencil in the head of the category you return to the settings of the category.
Create Xing Profile
In the category list now clicking on Edit (pencil) of the category.
Now, either click the 'New profile' and then the arrow icon, or click the plus in the head of the category:

Now, some information are needed:
- XING Profile, e.g.: John_Doe, explanations are provided in the help. (Help Wizard)
- XING Layout , explanations are provided in the help. (Help Wizard)
- activate "Published"
Then you click on "Save and close".
Front end Module
A new front-end module is create with:
- Layout -> Themes -> (Front end) Modules -> Add module (Contao 2.9 and newer)
At first, enter the title, and only then select in "Module type": 'Xing' - 'Xing list'. It changes the form fields.
In 'Xing Category' now select the previously created category, then 'Save and close'.
Now, the front end module must be included in the layout:
- Layout -> Themes -> Layout -> Edit the used layout (Contao 2.9 and newer)
Include in 'Included modules' the just-created front end module (e.g. to left)
CSS-File
As mentioned above, is provided a CSS file for presentation.
For the first tests you should copy the file mod_xing_fe.css from /system/modules/gl_xing to /tl_files / /files.
Then import them over the back end and activate it in the layout.
Technical Details
Technical details are inside of the category and in the constructed front end module feasible / adjustable.
Technical Details inside of the category
Team Profile
In the category, you can create multiple Xing profiles.
Use would be for example an overview of all team members.
Depending on the template selection in front-end module, the category name is the team name.
See the next section, as it could look like then.
Technical Details in the front end module definition
XING Template
Is defined in the category only one Xing profile, the following two templates are useful:
- mod_xing_list, it shows only the linked graphic

- mod_xing_list_profile, it shows the linked graphic, including the profile name (underscore is removed)

If several Xing profiles defined in the category to represent a team, the following two templates are useful:
- mod_xing_list_profile, it displays the graphics linked with each other, each including the profile name (underscore is removed)

- mod_xing_list_team, as mod_xing_list_profile, in addition displays above the first graphic the team name (category name)

You can save your own templates in the folder /templates or in the template folder of the used theme.
Template names must begin with mod_xing_list and must have the suffix .tpl / .xhtml / .html5. ( e.g.: mod_xing_list_club66.xhtml )
Company Template
For a company profile, XING has a different destination URL. Therefore it was created a custom template. Please select the template "mod_xing_list_company" for a company profile.
Show to guests only
Hide the module if a member is logged in.
Protect module
Show the module to certain member groups only.