Difference between revisions of "Contao.Dev ExtensionsCatalog"
From Contao Community Documentation
| (2 intermediate revisions by one user not shown) | |||
| Line 1: | Line 1: | ||
{{stub}} | {{stub}} | ||
| − | |||
= Catalog Module Documentation = | = Catalog Module Documentation = | ||
The Catalog and Catalog Extension modules are advanced modules and will require intermediate knowledge of PHP, HTML/CSS in order to create catalog that displays the way you really need it. To create advanced displays, you will need to understand PHP array structures provided in the TPL files. | The Catalog and Catalog Extension modules are advanced modules and will require intermediate knowledge of PHP, HTML/CSS in order to create catalog that displays the way you really need it. To create advanced displays, you will need to understand PHP array structures provided in the TPL files. | ||
| Line 114: | Line 113: | ||
Now create a new item by clicking the New item button in the header area. You see that the new item contains all the fields we defined and you may fill it in a very convenient way, just like in many other modules in Contao. | Now create a new item by clicking the New item button in the header area. You see that the new item contains all the fields we defined and you may fill it in a very convenient way, just like in many other modules in Contao. | ||
| − | [[File:catalog-item-edit.jpg | + | [[File:catalog-item-edit.jpg|200px|thumb|none|catalog item edit]] |
| − | Back-end Custom Item Display | + | == Back-end Custom Item Display == |
You can now also customize your catalog entries using a new feature in version 0.3.0. In the back-end you can define the format string in the catalog type definition (see using Catalog Module). Although values are already formatted using the catalog definition (format string), this format string additionally allows you to create thumbnails, wrap values in bold, italic. Actually any HTML is allowed. | You can now also customize your catalog entries using a new feature in version 0.3.0. In the back-end you can define the format string in the catalog type definition (see using Catalog Module). Although values are already formatted using the catalog definition (format string), this format string additionally allows you to create thumbnails, wrap values in bold, italic. Actually any HTML is allowed. | ||
| − | + | {{Note|Ensure that all fields you want to use in the Back-end display with this '''format title string''', have been selected as ''[x] Title field'' in their individual field definitions.}} | |
| − | {{Note|Ensure that all fields you want to use in the Back-end display with this | + | |
Below is an example of what you can achieve. | Below is an example of what you can achieve. | ||
First, enter the code in the Catalog Type definition of Format title string: | First, enter the code in the Catalog Type definition of Format title string: | ||
| − | <source><strong>{{title}}</strong> - {{price}} <em>[{{releasedate}}]</em> {{archived::src=all.gif}} {{archived}}<br /> {{image::w=60&h=80}}</source> | + | <source><strong>{{title}}</strong> - {{price}} <em>[{{releasedate}}]</em> {{archived::src=all.gif}} {{archived}}<br /> {{image::w=60&h=80}}</source> |
== Catalog Permissions == | == Catalog Permissions == | ||
Latest revision as of 13:55, 30 December 2011
| |
Incomplete Article: This article is not finished yet and needs expansion.
Please expand it and remove this notice when it is finished. |
Contents
- 1 Catalog Module Documentation
- 1.1 Installation
- 1.2 Reference Links
- 1.3 Site Examples
- 1.4 Create your Catalog
- 1.5 Define Catalog fields
- 1.6 Use the Taxonomy Module to create selectable options
- 1.7 Using Formatting on a text, number or decimal field
- 1.8 Edit Catalog Items
- 1.9 Back-end Custom Item Display
- 1.10 Catalog Permissions
- 1.11 Front-End Modules using the Catalog Extension
Catalog Module Documentation
The Catalog and Catalog Extension modules are advanced modules and will require intermediate knowledge of PHP, HTML/CSS in order to create catalog that displays the way you really need it. To create advanced displays, you will need to understand PHP array structures provided in the TPL files.
The Catalog System is currently divided into two modules (which will merge in the next release). You will have to install both catalog and catalogext to get all the features.
The Catalog (main) module allows user to define and manage catalogs of items. The CatalogExt adds features and allows you to build powerful front-end modules to display and arrange the data in your catalog.
Imagine you want to show to visitors of your site a list of your games. You may have many games, but all share certain attributes, like title, author, genre, console formats, release date, etc. You want to save all this information and later present it to visitors, let them show only games in the driving games genre, or games with price above a certain amount, only games that are available, etc. This module allows you to do just that.
In this documentation we will create a catalog of computer and console games.
Installation
- Download Catalog from Extension Repository
- Download CatalogExt from Extension Repository
Install both packages from the Repository or download the ZIP and install files in their relative folders.
Reference Links
- [ExtensionsCatalogExt Catalog Extension] module to create front-end modules
- [TutorialsCatalog Catalog Templates Tutotial] explains advanced template customisation
- [TutorialsCatalogMultiLanguage Catalog Multi-Language Tutorial] explains how to easily set-up multi-language catalogs
Site Examples
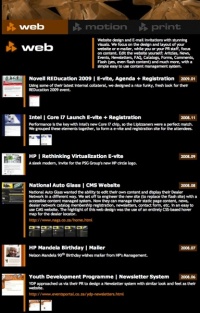
Thyon Design My own Client catalog (no reader, just list)
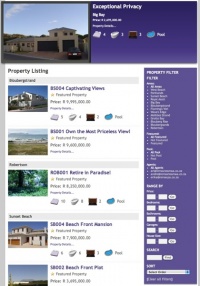
TeamAA Property Catalog Property Website
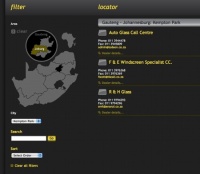
National Auto Glass Auto Glass Company -- with CSS hover-map
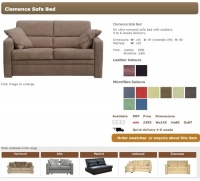
English Sofa Company Sofa Company
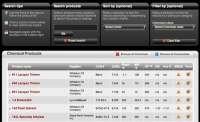
Whitaker Oil Company Oil Chemicals
Create your Catalog
The first step is to create the catalog of items. Click Catalog in the left menu and then click New catalog in the top action menu.
The catalog list shows the name, item count and optionally the image thumbnail if set.
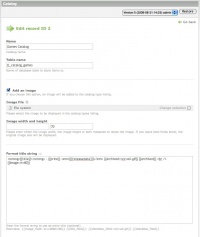
Now fill the form as seen on image bellow. Name is only for your orientation, it is displayed in item types list. More important is Table name. It is the name of the table which will store your catalog data. Use only letters, numbers and underscore, but make sure table name does not start with number. Also some names are reserved, so you may obtain an error when creating item type. It is a good idea to add prefix to your tables like cat_, so that you know they belong to catalog, e.g. cat_mycatalogname
Leave the format title string empty for now, we get to that in a later section.
You can also add an image and set its preview size (as in picture above). This will be displayed below the name of the catalog when you return to the catalog list.
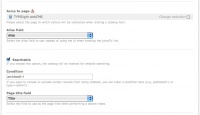
Further down (installed by the Catalog Extension module), you will find additional parameters to set.
Catalog Extension - additional catalog fields
- Adds a JumpTo page to the Catalog, which will use the selected alias instead of id (creating nice SEO Urls) -- you will of course need to create fields first (as described further down), so once you have created an alias field, you can come back to this section to select it here.
- Adds [x] Searchable to the Catalog, indexes each entry above using its alias and title as page title -- again, you will first need to setup fields so that the drop-down will show fields.
Now click Save and close. Don't click Save and edit, because we need to define fields, before we can add our items. (As a matter of fact you can add items now, but they won't contain any useful information).
Define Catalog fields
Next to the catalog you just created, click the Define fields button (shown on the image bellow).
After that the list of item type fields is displayed. It is currently empty. So go ahead and create new by clicking the New field button.
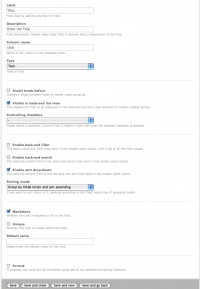
After that the field definition dialog appears. You need to enter Label, Description and Column name. The rules for column name are the same as for the table name, so use only letters, numbers and underscore.
Next you need to specify the type of item. Type tells what may user put into the field. For example if you want to store book title, you will choose field type text. If you want to store number of pages, use type number. If you want to add longer description, use longtext. After selecting type, you may further customize the field. I believe you will be able to figure out what type best serves what purpose.
Valid field types are:
- text - for titles and short heading
- alias - creates unique text alias reference, based on a selected title field
- longtext - for descriptions, with rich text support
- number - integer numbers only (can be formatted)
- decimal - floating point numbers (can be formatted)
- date - dates, can be entered using a date calendar clicker (can be formatted)
- checkbox - toggle states like published or archived (use as filter or hide sections when selected as controlling checkbox)
- select - single selection drop-down from a database list (taxonomy module, another catalog or your own reference database)
- tags - multi-select checkboxes from database list (taxonomy module, another catalog or your own reference database)
- url - used to create e-mail and http links automatically
- file - store file links or images (thumbnail support with width, height)
You can also set various visual options like: insert break (field separation line), title field (shown in items list), filter (in BE), search (in BE), sort (in BE), grouping mode (in BE) and controlling checkbox (hides field below this checkbox).
Then there are also other control options like: mandatory (field is then required), unique, default value and format (string, number, money, date formats supported).
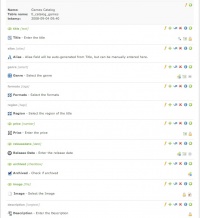
Now click Save and we have our first item field. Create as many fields as you want. The examples created the following fields:
Use the Taxonomy Module to create selectable options
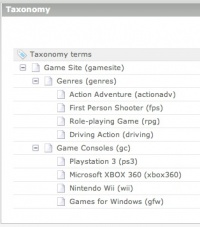
In order to create a quick reference for options like genres or formats you can simply create these in a tree within the taxonomy module and use them as input reference for a select or tags field type.
Here is the Taxonomy module's configuration for this Games Catalog example:
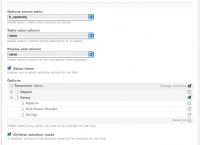
To use the Taxonomy as a reference in Select and Tags field types, you have to choose the tl_taxonomy table as your reference.
Using Formatting on a text, number or decimal field
The formatting option allows you to format the field. Here are the ways in which to do it:
- Text - enter sprintf format string (see "more more options):
Help on [%s":http://php.net/sprintf] => Help on [Space Invaders]
- Number - enter decimals only, as TL configured separators are used
2 => 1,524.31
- Date - enter date-time format (see "for more options):
Y-m-d H:i => 2009-03-02 17:34
- Money - this function will most likely be deprecated, because not all PHP configurations are correctly set-up for the correct LOCALE, so 90% of the time, this php function doesn't work correctly.
Edit Catalog Items
We have successfully defined fields for our catalog. Now it is time to create few catalog items.
Select Catalog module again and you will see a list of item types defined. Click the Manage items button to add, delete and edit items.
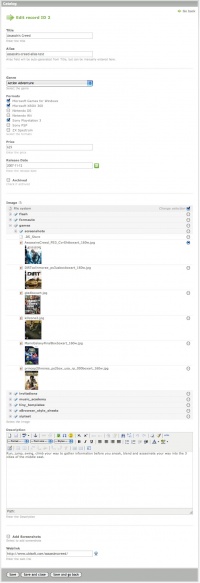
Now create a new item by clicking the New item button in the header area. You see that the new item contains all the fields we defined and you may fill it in a very convenient way, just like in many other modules in Contao.
Back-end Custom Item Display
You can now also customize your catalog entries using a new feature in version 0.3.0. In the back-end you can define the format string in the catalog type definition (see using Catalog Module). Although values are already formatted using the catalog definition (format string), this format string additionally allows you to create thumbnails, wrap values in bold, italic. Actually any HTML is allowed.
| |
Note: | Ensure that all fields you want to use in the Back-end display with this format title string, have been selected as [x] Title field in their individual field definitions. |
Below is an example of what you can achieve.
First, enter the code in the Catalog Type definition of Format title string:
<strong>{{title}}</strong> - {{price}} <em>[{{releasedate}}]</em> {{archived::src=all.gif}} {{archived}}<br /> {{image::w=60&h=80}}
Catalog Permissions
The Catalog application is integrated into the TYPOlight user permissions system and will allow you to set permissions for editing items within User and User Groups (for Back-end). You will be able to restrict who can edit which Catalog.
<code class="div">
Only the Administrator can create, edit or modify field types, so you cannot give a User permissions to change the catalog's table structures.
</code>
Front-End Modules using the Catalog Extension
Catalog Extension modules:
- Catalog Filter Module: build your filter on field values, range, date, search.
- Catalog List Module: displays a list of items responding to the filter above.
- Catalog Reader: displays item detail view + reference info (jump links to other catalogs).
- Catalog Notify: creates contact form for clients to send contact info on catalog item (used on reader page)
- Catalog Featured: selectable number of (random) items filtered by a preset condition.
- Catalog Related: show related catalog items (except current) with selectable matching parameters.
- Catalog Reference: show child catalog items where a selected reference field is matching the current viewed parent item.
You may continue configuring your catalog using the documentation for the [ExtensionsCatalogExt Catalog Extension] module to create the front-end modules listed above.
